Post installation operations
Start virtual machine
For creating Virtual Machines (VMs), we use “templates”. Templates are images based on previously saved VMs. After a fresh install there aren’t any templates. To create a new one click on the “new” button on the Templates dashboard menu and choose “Create a new base VM without disk”. To proceed click “Next”. Following the above steps, you will be taken to the template’s configuration page.
Configure Template
To properly configure the template, you must check the “boot menu” checkbox. Also note that fields marked with an asterisk(*) must be filled. That means you have to fill out the “Name” and “Operating system” fields, according to the operating system you are installing. Please choose the appropriate option from the “Networks” and “Lease” settings.
To enable the VM to have internet access, you should choosemanaged-vmfrom the “Networks” list.Recomended network setting
Finally, you are ready to create the template by clicking “Create new template” at the bottom of this configuration page.
Add disk
Currently we don’t have any disks attached to our VM. To add one, choose the “Resources” tab. Click on the “create disk” button and set the name and size. See an example below:

Disk setup
Attach ISO
To install an OS, we use installation ISO images. In order to allocate one ISO image, click on the “download disk” and type the ISO’s URL. See an example below:

Allocating and downloading an ISO
Template creation tutorial
For the next steps, you can follow the tutorial on the template creation page or continue with the following steps. The tutorial looks like the image below:

Template tutorial
Deploy master VM
It’s time to start your master virtual machine of your new template by choosing the “deploy” button. As a last step, you may have to select a Node for your VM. If you do not change the default selection, the system will choose the best fitting one for you. See an example below:

Node selection example
Install OS
Now you are ready to connect to the master virtual machine and make the necessary configurations and installations. Do not use any personal information in this step!

Installation example with Ubuntu 14.04
Delete ISO
After setting the master virtual machine up for further replication, it’s highly recommended to delete the downloaded ISO by clicking on the “Remove” button on the “Resources” tab.
See below:

Removing ISO
Save Template
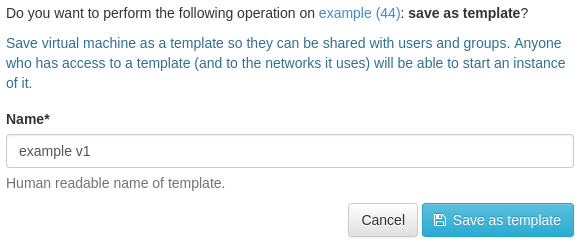
Now everything is ready to save the template. Click on the “save as template” button (see an example below). Fill in the name field with a name that represents what this template is about. This will save all the modifications you have done so far. Users who get permission to use this template are able to create their virtual machines with your saved settings.

Saving and creating a named template
